 I use the cheapest, most basic Garmin eTrek GPS unit which I bought in Singapore for not very much. I gather this is now discontinued, but there are other Garmin cheap replacements which will work. Image courtesy of the Garmin website. I also got the serial port cable that goes with it. I gather there might now be a USB port cable, but I'm using the older serial port cable. I use a mac iBook G4 computer... and though it's a brilliant computer, there is no software I have found that runs on it to download the data. So I use my wifes Windows 2000 machine.
The software I use is DNR Garmin which is written by the Department of Natural Resources at Minnesota University in the USA. Download and install this using the link above.
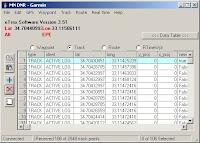
 Connect your eTrex or other GPS unit to the computer using serial or USB cable and then start the DNS Garmin program. By doing it this way round DNS Garmin should automatically find your GPS unit. Then select track and download. With a little bit of luck the program should start downloading all the track data from your GPS.
It can take quite a bit of time to download the data if you are using the serial cable as the transfer is only 9600 baud. So be patient, especially if there is a lot of data to download.
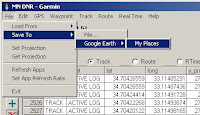
 When its all downloaded select save to Google Earth. The option you need is 'Line', not point or polygon. Wait for a while and it will eventually say its saved to 'My places'. The in Google Earth open and, if you want, edit the track. Simple as that... but remember to clear the track data from your GPS otherwise next time it will downlaod the track again.
You can also export points from Google Earth and import into DNR Garmin as Waypoints... which I use. But I'll let you experiment doing that yourself.

No comments:
Post a Comment